Files, email & feedback
Three utility tools that round out daily Admin work: document management, email delivery tracking and product feedback.
File management & settlement attachments
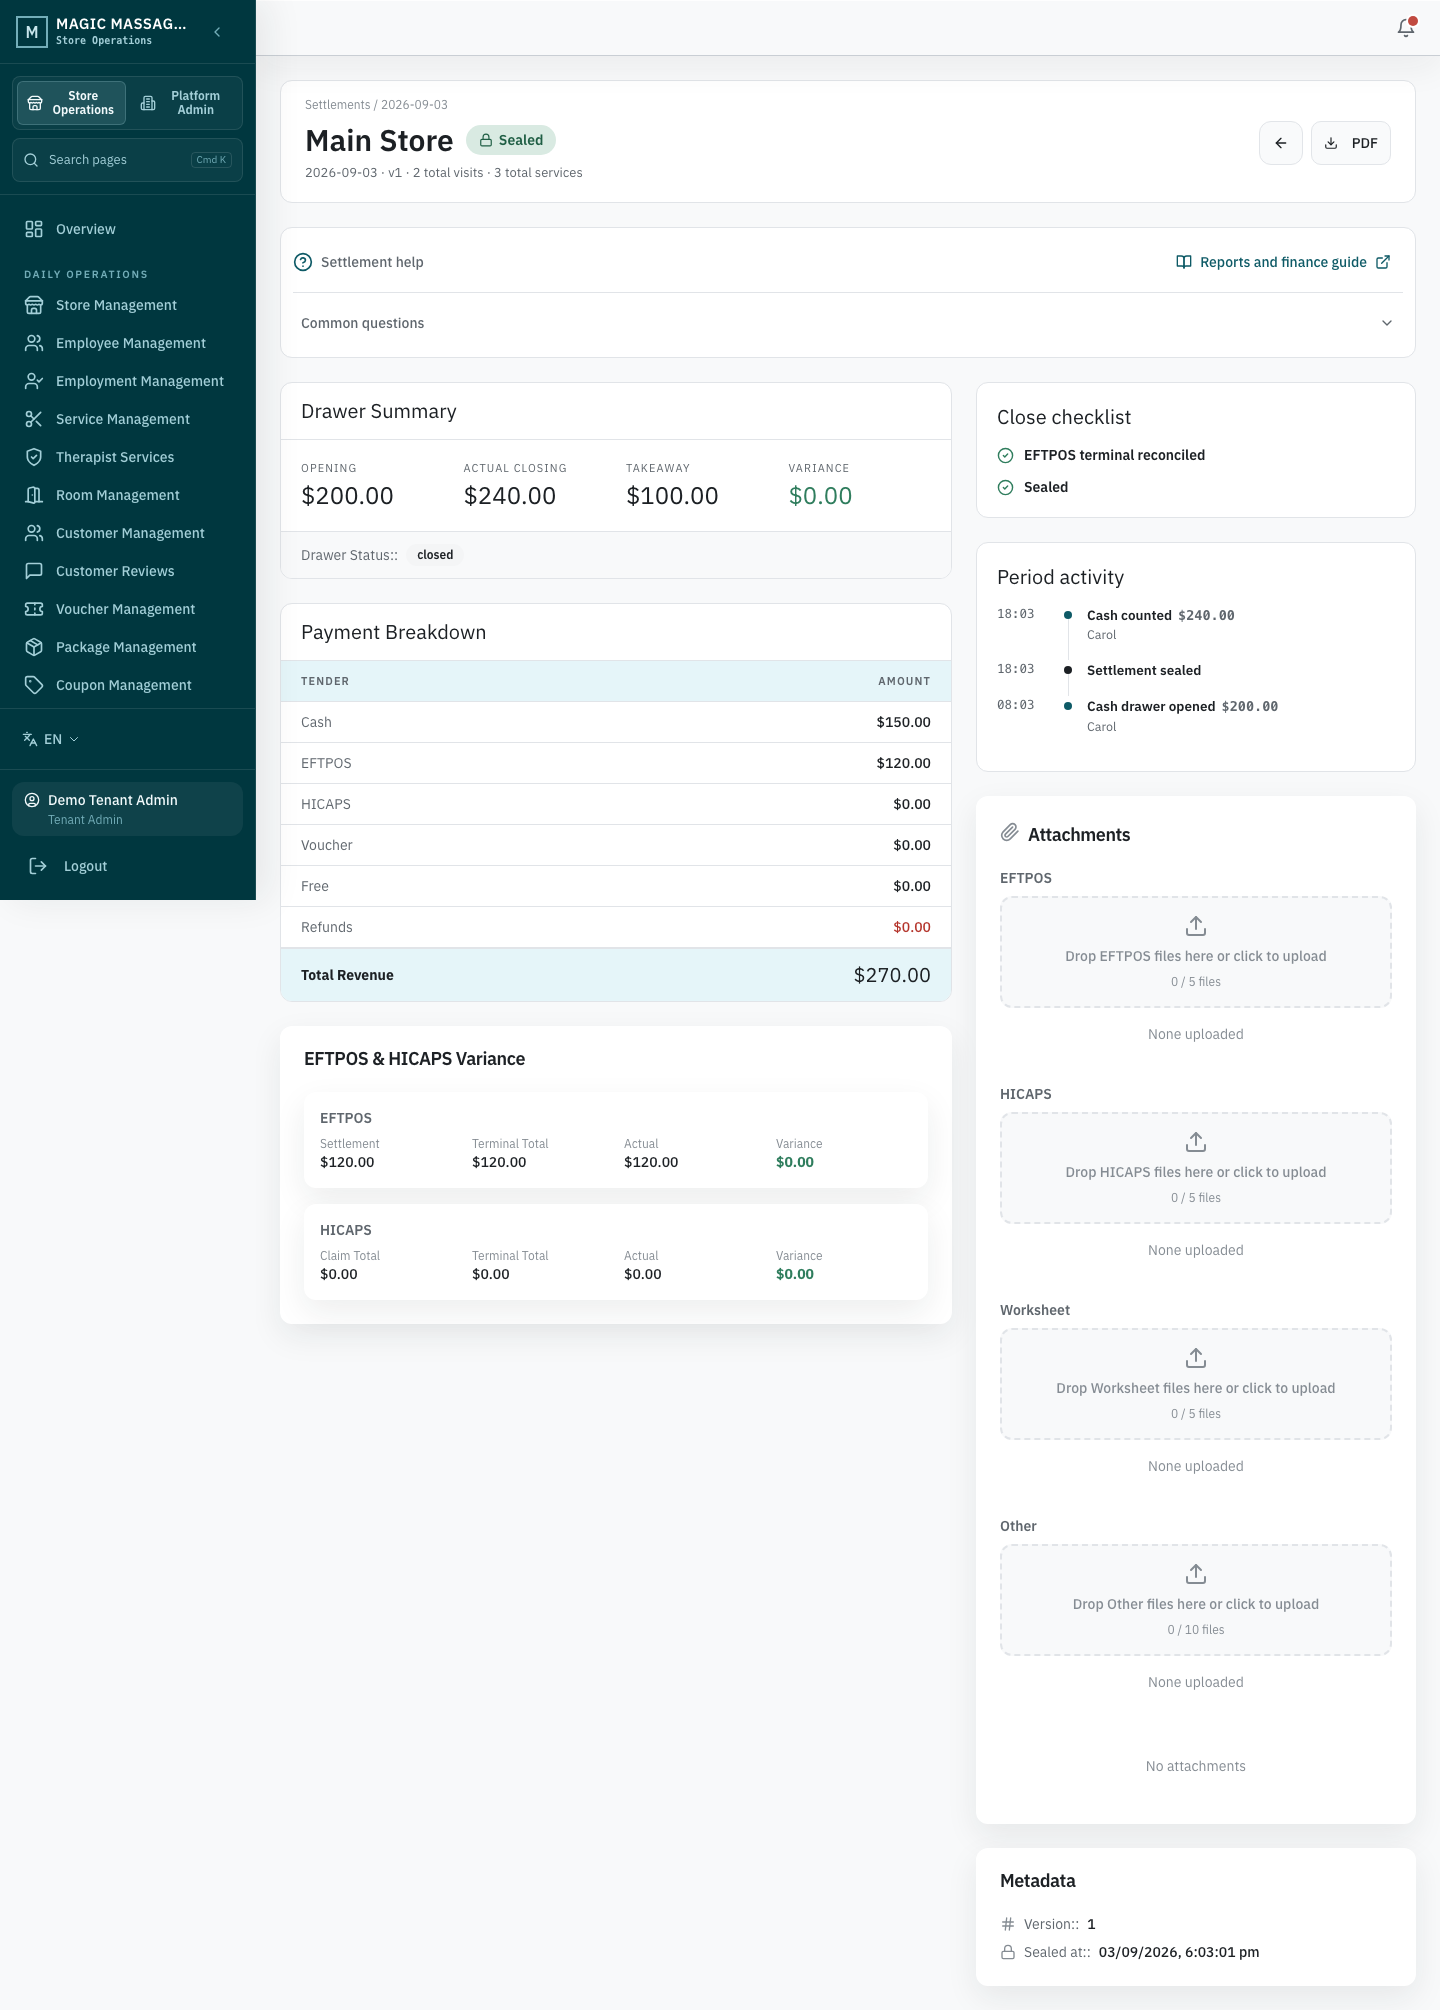
Admin → Settlements → settlement detail page (the separate Admin → Documents page, titled File Tracking, is a Super Admin surface — a read-only list of filename, size, sync status, SharePoint state and a Download action)
Settlement attachments (terminal batch reports, worksheets, receipts) are a settlement capability with two independent store-level upload switches — Allow POS settlement attachment upload (off by default) and Allow Admin settlement attachment upload (on by default) — configured in the store's edit form and enforced server-side. Each attachment belongs to one specific settlement version:
- A Final Settlement is created already sealed, and sealed versions never accept uploads. To attach evidence, the store requests a reopen, an Admin approves it with a reason, and the resulting correction draft (version 2+) accepts uploads on its detail page — from Admin, and from POS too when the store's POS upload switch is on (a plain file picker today; camera-equipped POS hardware can use the same flow).
- Accepted files: JPEG/PNG/HEIC images and PDF, up to 20 MB, with a per-category file limit counted per settlement version.
- Uploaded attachments can be deleted again only while the version is still a draft; system-generated files (the settlement PDF) can never be deleted by anyone. A Super Admin can regenerate the settlement PDF — the new generation becomes current while earlier generations are retained.
- Sealing the correction version freezes its attachments permanently.
- A correction version also lists the previous versions' evidence read-only — historical files keep their original version ownership and are never copied.
- Every attachment shows its cloud archive status (synced / pending / failed).
- All uploads and generated files count toward the tenant's storage quota (reported as user-uploaded vs system-generated in the subscription usage view).
Email log
Admin → Email Logs (super admin / tenant admin)
Every email the system sends passes through here — receipts, booking confirmations, daily report PDFs, onboarding invitations.
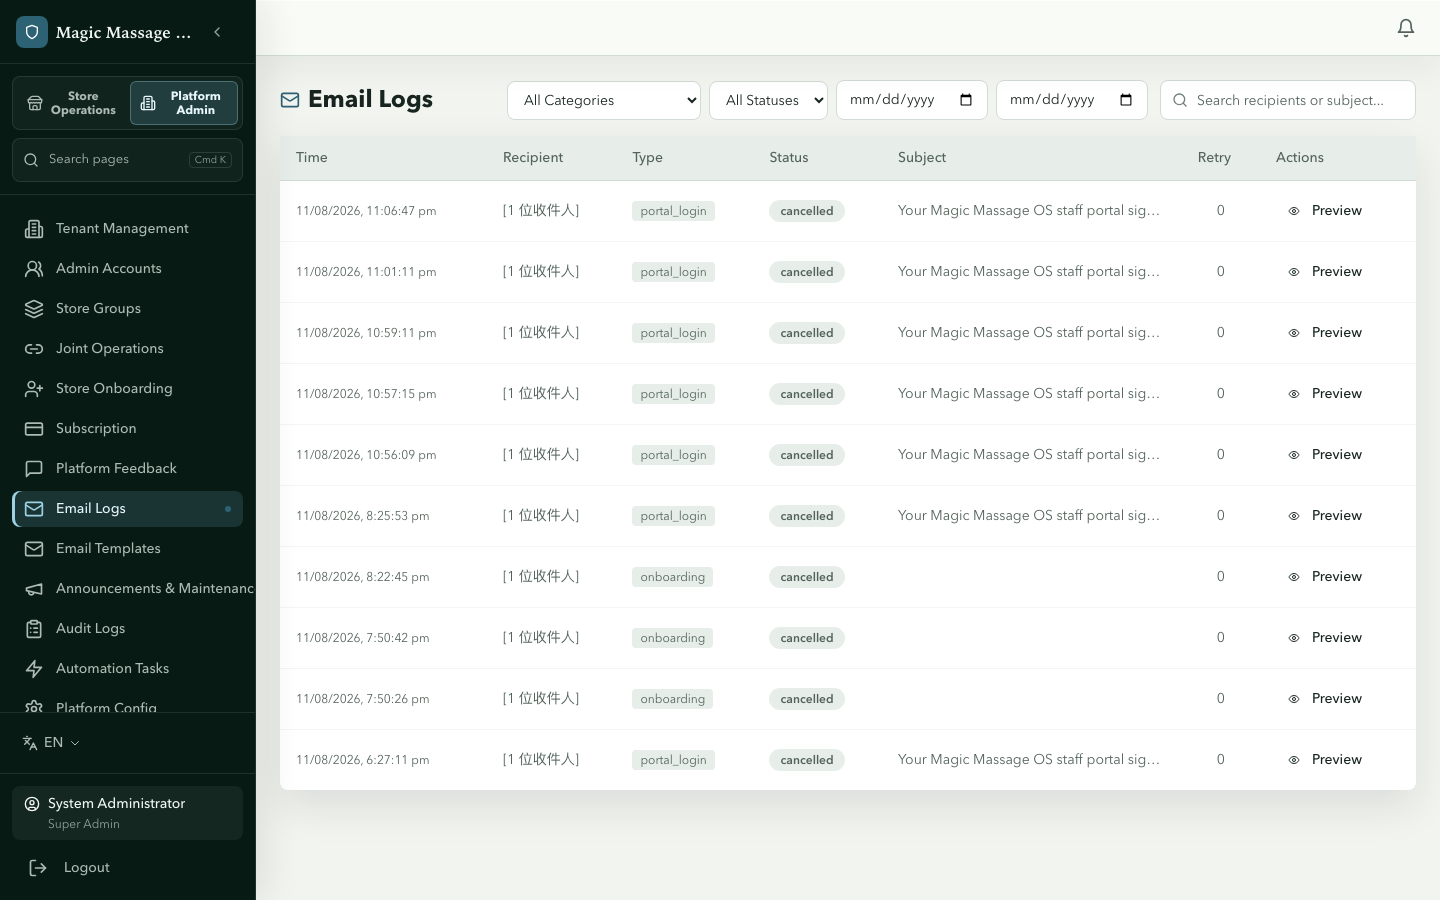
| Column | What it shows |
|---|---|
| To | Recipient email |
| Subject | Email subject line |
| Category | onboarding / appointment / settlement / billing / invoice / marketing / test |
| Status | pending / sent / failed / bounced / cancelled |
| Sent at | Timestamp of delivery (or last attempt) |
| Retry count | How many times delivery was attempted |
When a customer says "I didn't get it"
- Open Email Logs.
- Filter by category, status and date first — the search box only matches rows already loaded on screen.
- To read the full recipient address, open the row's Preview and click Reveal recipient (this is audited).
- Check status:
- Sent → arrived at the mail server; check spam/junk.
- Failed → click Retry to resend.
- Bounced → email address invalid; confirm with the customer and correct.
- If the email was never created, the triggering action may not have completed (e.g. the receipt was never generated — check the visit).
Sender identity (who the email comes from)
The From address on an outgoing email is resolved in this order — the first level that has an address wins:
- Store sender — Admin → Stores → edit store → Email settings. Use this when a store wants its own address on booking confirmations, receipts and daily reports.
- Tenant sender — the Tenant sender identity card at the bottom of Admin → Email Logs (tenant admin). A single default for the whole business; stores without their own sender fall back to it.
- Platform sender — set by the platform operator in Platform Settings.
Platform emails (onboarding invitations, admin account activation, the store device PIN sent when a store is created) always use the platform sender, regardless of store or tenant settings. Each email log freezes the selected sender when it is queued; later setting changes and retries do not rewrite it. Preview shows that frozen sender.
The address you enter must be one your email provider is allowed to send as. With Google, it has to be a configured "Send mail as" alias of the delegated mailbox — otherwise Gmail replaces it with the delegated address. With Microsoft 365, it must match the mailbox authorised by the active integration credential. Sending is only live once provider credentials are configured and enabled; nothing in this page changes that.
Provider configuration status
- Email: Super Admin uses Platform Settings → Email & Notifications to choose Google Gmail API or Microsoft 365, set the platform sender, enable sending and send a test. Encrypted platform credentials are managed in the Microsoft 365 tab; a Store can use its own credentials under Stores → Integrations. A saved setting or successful local test is not evidence that real external delivery has been accepted in Production.
- AI: Super Admin uses Platform Settings → AI Providers to save an allowlisted OpenAI or Anthropic profile, a write-only API key, model/routing settings and explicit activation. The page itself sends no AI request. Core Owner Intelligence remains deterministic when every provider is disabled; real-provider traffic still needs separate activation and acceptance evidence.
- WhatsApp and WeCom: no production credential or activation UI exists. Marketing shows these channels as unavailable and cannot enable them; the current adapters are development/test boundaries only.
- Daily Brief: the Store schedule is managed under Admin → Owner Intelligence when the operator has schedule permission. It is disabled by default, and preparation records an advisory snapshot only — it does not send a message.
Email templates
Admin → Email Templates (super admin only)
Email Templates is a platform surface: only a super admin can view or edit them, and every change applies to all tenants. Use the store/tenant sender settings above for per-business changes. Each template has:
- A template key (system identifier)
- Subject and body (Jinja2 with variables like
{{customer_name}},{{store_name}}) - A Preview button to see the rendered output
- A Reset button to revert to the platform default
Product feedback
Admin → Platform Feedback
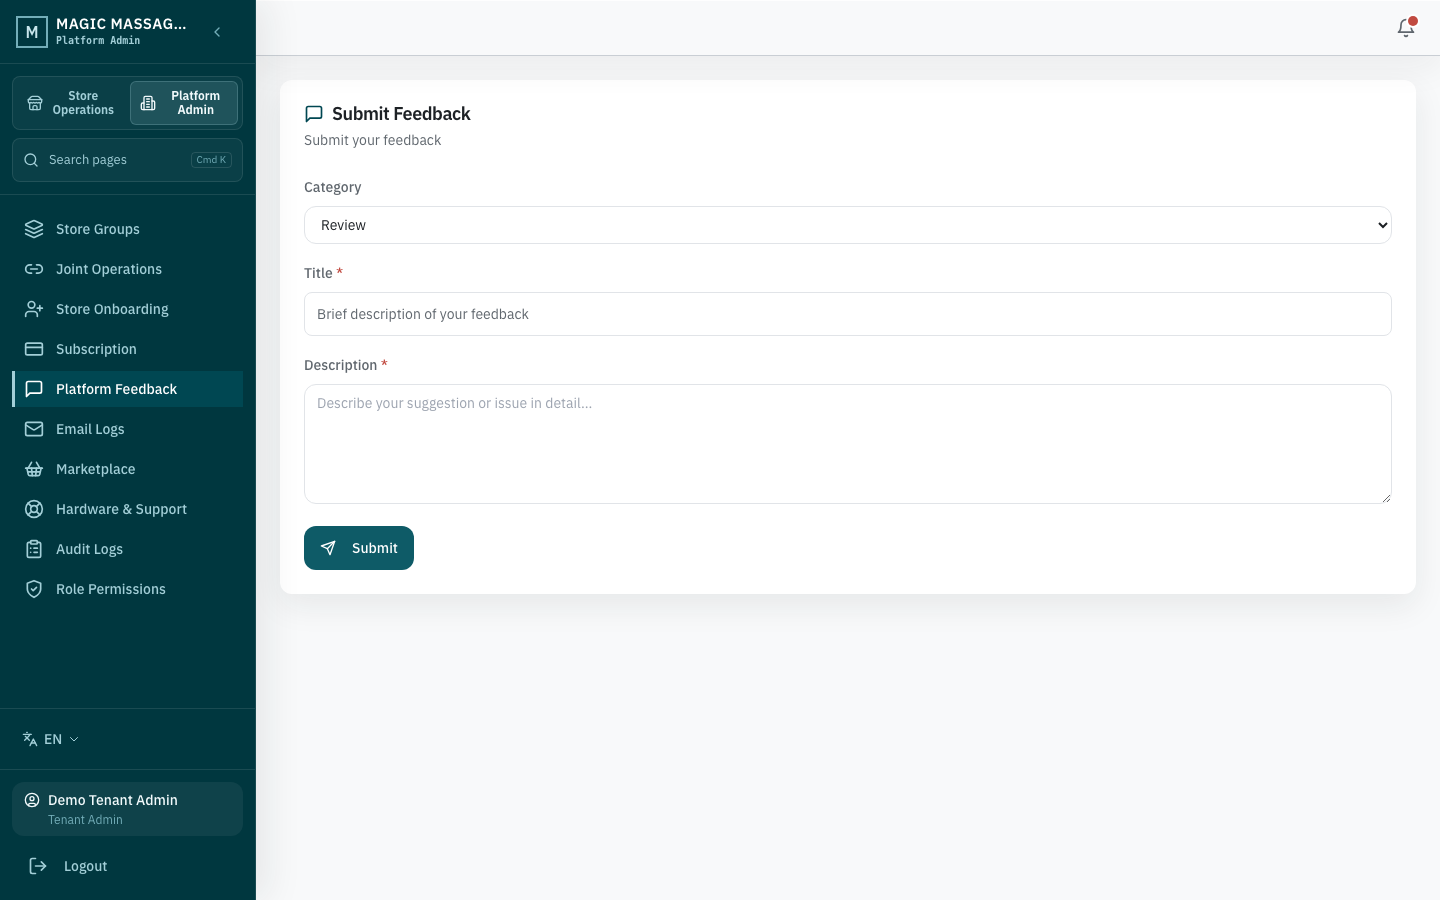
Report bugs, request features or leave a review about Magic Massage OS itself — directly from the Admin interface. This is feedback about the software, not customer reviews of your massage services.
Submitting feedback
- Click Platform Feedback in the sidebar (available to super admin, tenant admin and regional manager accounts when the Platform Feedback feature is enabled for your plan).
- Choose category: Bug, Feature request or Review.
- Fill in title + description.
- For bugs only: add priority (low/medium/high/critical) and paste the page URL of the affected page — the form hides these two fields for Feature request and Review.
- Optionally attach files (screenshots, exports).
- Submit.
After you submit
Feedback goes straight to the platform product team, which triages it through submitted → in_progress → resolved. The same page lists the feedback submitted from your business, filterable by submitter, priority and status, so you can follow the triage state of earlier reports. Only a super admin can move an item between statuses.
Feedback goes directly to the product team — not to a general support queue. Include the three details that halve the back-and-forth: which page, what you clicked, and the exact message shown.